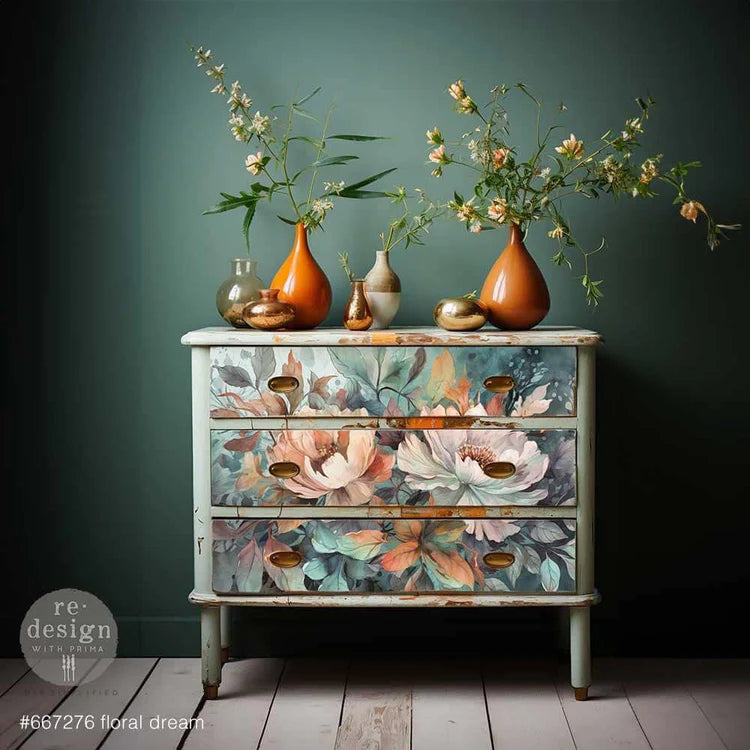
In the decoupage technique, image motifs are glued directly onto the furniture using a special decoupage adhesive .
Mint decoupage papers have been specially developed for furniture art, furniture design and upcycling. Thank you Michelle for this enrichment in the furniture design heaven. Mint by Michelle's mission is to transform beautiful paintings by old masters, modern animal and landscape photography, simply put, images that you love to look at every day into a form that enables furniture to be designed in a breathtaking way. For me as a furniture artist, another step in a creative direction. The printed paper is wafer-thin, silky and somewhat reminiscent of greaseproof paper.
Photo quality is vibrant and colorful. Thanks to these properties, you can easily adapt, move, cut the decoupage and, after drying, achieve different looks with chalk paints, cracks (crackle varnish), high-gloss, semi-matt or matt sealing, decorative waxes, sandpaper and the great wood applications, woodubend mouldings. But later I will post tutorials on facebook, instagram or youtube. Subscribe to the Lioness Vintage channels now.
Here I have put together a short guide for you. Find your favorite motif in the shop beforehand and don't forget to order the necessary decopage glue. Choose between DIN A3 and very large in DIN A1. If your picture is sold out in the right size, then put it on the wish list. I will then order it for you and let you know.
Before you start, review the two approaches and watch Michelle's video tutorial. There you can see how to do it right.
Method 1, which I recommend for the absolutely charming vintage style, aged, authentic and a little crumpled. (as shown in the video)
Coat the furniture surface with decoupage glue. It should not be too little so that you can still move it, but not too much either, otherwise the glue will build up. Use a brush. Now place the whole picture on the surface to be glued and adjust it. Please do not cut beforehand. Go step by step, top to bottom. With a handful of cling film you stroke over the image. You decide how many folds there can be. Repeat both steps until the whole picture is attached to the furniture. If the decoupage is too long, don't cut anything off yet and don't open the drawers. When wet, there is a high probability that it will tear. Be patient and let it dry for a day. Only then cut very carefully between the drawers and do not tear. Use a sharp utility knife or craft blade. You carefully remove the length with sandpaper. Work backwards in fine strokes. Now use sandpaper to remove any excess paper from the drawers. Now you seal your picture with a clear coat. You can also apply several layers. Always let it dry completely. Play with the wrinkles. Smooth them out with very fine grit sandpaper with each new coat of paint. With crackle (shop) you can also create cracks. It looks really dramatic and shabby.
Second method for an even, clean and flush gluing result
Apply the furniture top with a thick layer of decoupage glue with a brush and let it dry. Then repeat the same. Place the image on the surface and lay parchment baking paper on top. Now you need an iron and put it on medium heat. Iron the baking paper very carefully from the center until the image is firmly attached to the surface. Never set the iron too hot.
Now the finish. If your furniture has a little-used surface, you don't necessarily need to seal it. With an oil-based clear coat, you can apply as many coats as you want. If you prefer to use a water-based sealant, then spray the picture 3 times with a very thin layer of spray paint. Always allow to dry between coats. After all layers have dried, varnish with a water-based varnish (Dixie Belle clear coat). If it is a table that is used more, you should rather choose Dixie Belle Gator hide.